Getting Started
This tutorial walks through a first session with Milan Manager: installing the application, connecting it to a Milan network, routing an audio channel from a talker to a listener, and saving the result to a file. Each step links to the page that documents the respective feature in detail.
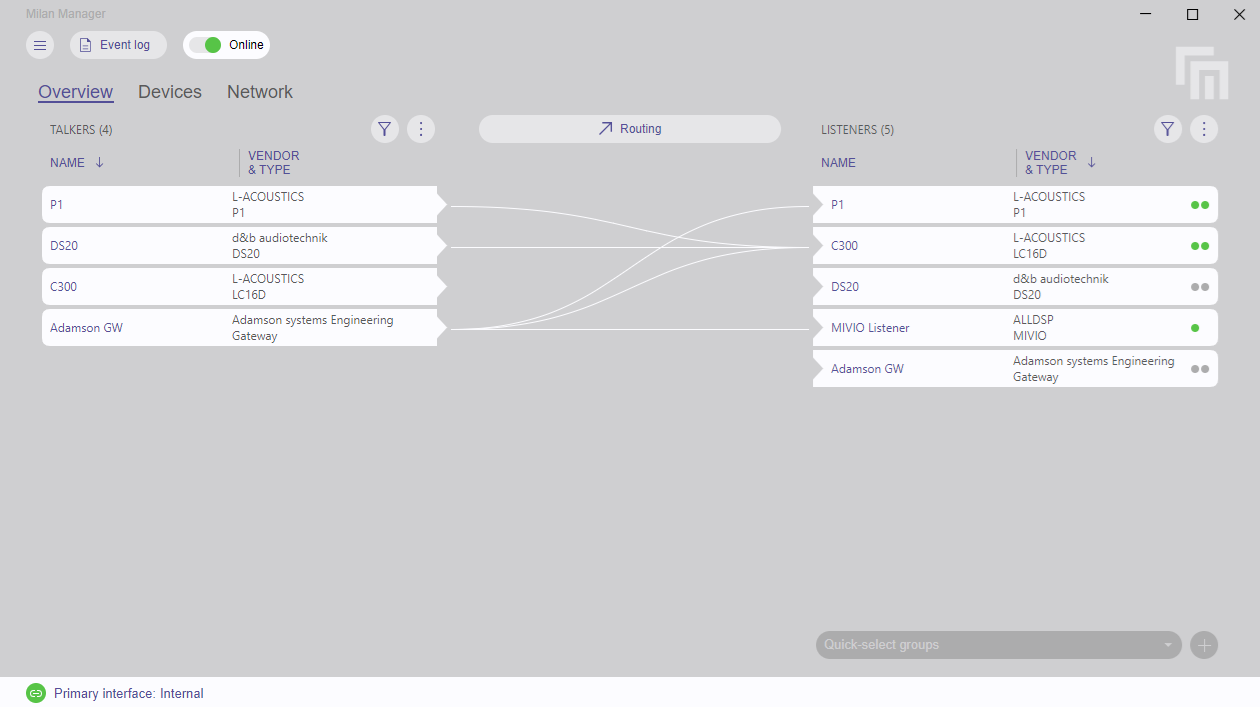
The tutorial uses Channels mode, the Workflow active after installation. Background on the terms used below, such as talker, listener, stream, and Media Clock, is available in Concepts.
Prerequisites
- A computer running Windows or macOS with a wired Ethernet interface.
- At least one Milan talker device and one Milan listener device.
- The computer and the devices connected to the same AVB-capable network. Further details are available in AVB domain.
- Administrator rights for the installation on Windows.
Step 1: Install Milan Manager
Windows
Milan Manager accesses the network through a packet capture library, which is not included in the installer. If neither Npcap nor WinPcap is present, the installer displays the message 'No packet capture library found' together with a link to the Npcap website.
- Download and install Npcap or WinPcap.
- Run the Milan Manager installer (
.exe) and accept the license agreement. - Complete the installation. Missing components, such as the .NET runtime and the Microsoft Visual C++ redistributable, are installed automatically.
macOS
- Open the Milan Manager disk image (
.dmg). - Drag Milan Manager onto the 'Applications' folder.
- Start Milan Manager from the 'Applications' folder.
On macOS, Milan Manager requires the ChmodBPF helper to access network interfaces. If the helper is missing, a dialog appears at startup. Left-clicking 'Install ChmodBPF' opens the ChmodBPF installer package and closes Milan Manager. After the package is installed, start Milan Manager again.
Step 2: Select a Network Interface
Milan Manager communicates with devices through one network interface of the computer. When no interface is configured (or the configured one is no longer available), a dialog listing the available network interfaces appears at startup.

- Open the dropdown menu and select the interface connected to the Milan network. The IP address and MAC address of the selected interface are displayed.
- Left-click 'OK'.
Milan Manager starts discovering devices on the selected interface immediately. The interface can be changed at any time from the lower left corner of the application, as described in Connect to a network.
Step 3: Check the Discovered Devices
Before audio is routed, a short check of the discovered devices avoids the most common causes of failed connections. Switch to the Devices tab.

Verify the following:
- All expected devices are listed. If a device is missing, check its cabling and the selected network interface. The Network tab displays the topology.
- All devices use the same sampling rate. Devices with different sampling rates cannot exchange audio. If supported by the devices, the global sampling rate selection adjusts all devices at once. If not supported, changing a sampling rate may require the device configuration to be adjusted manually.
- Exactly one device shows the purple Media Clock leader icon. Orange icons indicate several Media Clock leaders, which split the network into separate Media Clock domains. The Media Clock section describes how to select a single leader.
Step 4: Route a Channel
In Channels mode, audio is routed by connecting a talker channel to a listener channel. Milan Manager sets up the required streams in the background. Switch to the Overview tab.
- In the talker list on the left, left-click the talker device.
- In the listener list on the right, left-click the listener device.
- Left-click the 'Routing' button in the center of the view to open the routing panel.
- Drag a channel from the talker's 'CHANNELS' column onto a channel in the listener's 'CHANNELS' column.

A connection line in the 'STREAMING' column confirms the routing. The  icon next to the channel indicates that audio is transmitted over the network.
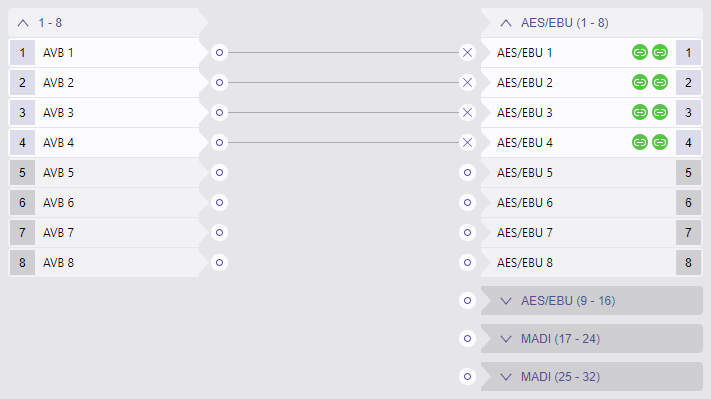
Milan Manager decides which stream carries the channel and whether existing stream connections can be reused. The underlying rules are explained in Automatic connection handling.
May interrupt audio
On devices that already transmit audio, a new channel connection may modify an existing talker mapping and briefly interrupt audio on that stream.
Further routing options, such as selecting multiple listeners or choosing a specific stream, are documented in the Routing section of the Overview tab.
Step 5: Save the Network State
Saving the network state keeps a record of the current routing and device configuration, which can be restored later.
- Left-click the
 button in the upper left corner to open the main menu.
- Left-click 'Save network state', or press S together with the Ctrl key (Windows) or the ⌘ key (macOS).
- Select a location and file name in the 'File save...' dialog. The default file name contains the current date and time.

Note
Milan Manager does not save the network state automatically. Stream connections, channel mappings, and device settings can only be restored from a previously saved file.
The file can be applied to the network again using Load network state.
Next Steps
- Concepts explains AVB domains, redundancy, and clocking in more depth.
- Streams mode provides direct control over stream connections and channel mappings. Switching between workflows is described in Workflow.
- Offline editing prepares a network configuration without connected devices.
- The Event Log records all changes and errors during a session.